Blog
The Drywall Phase: Your Last Chance for Custom Home Upgrades
Published
Category
Construction Guides
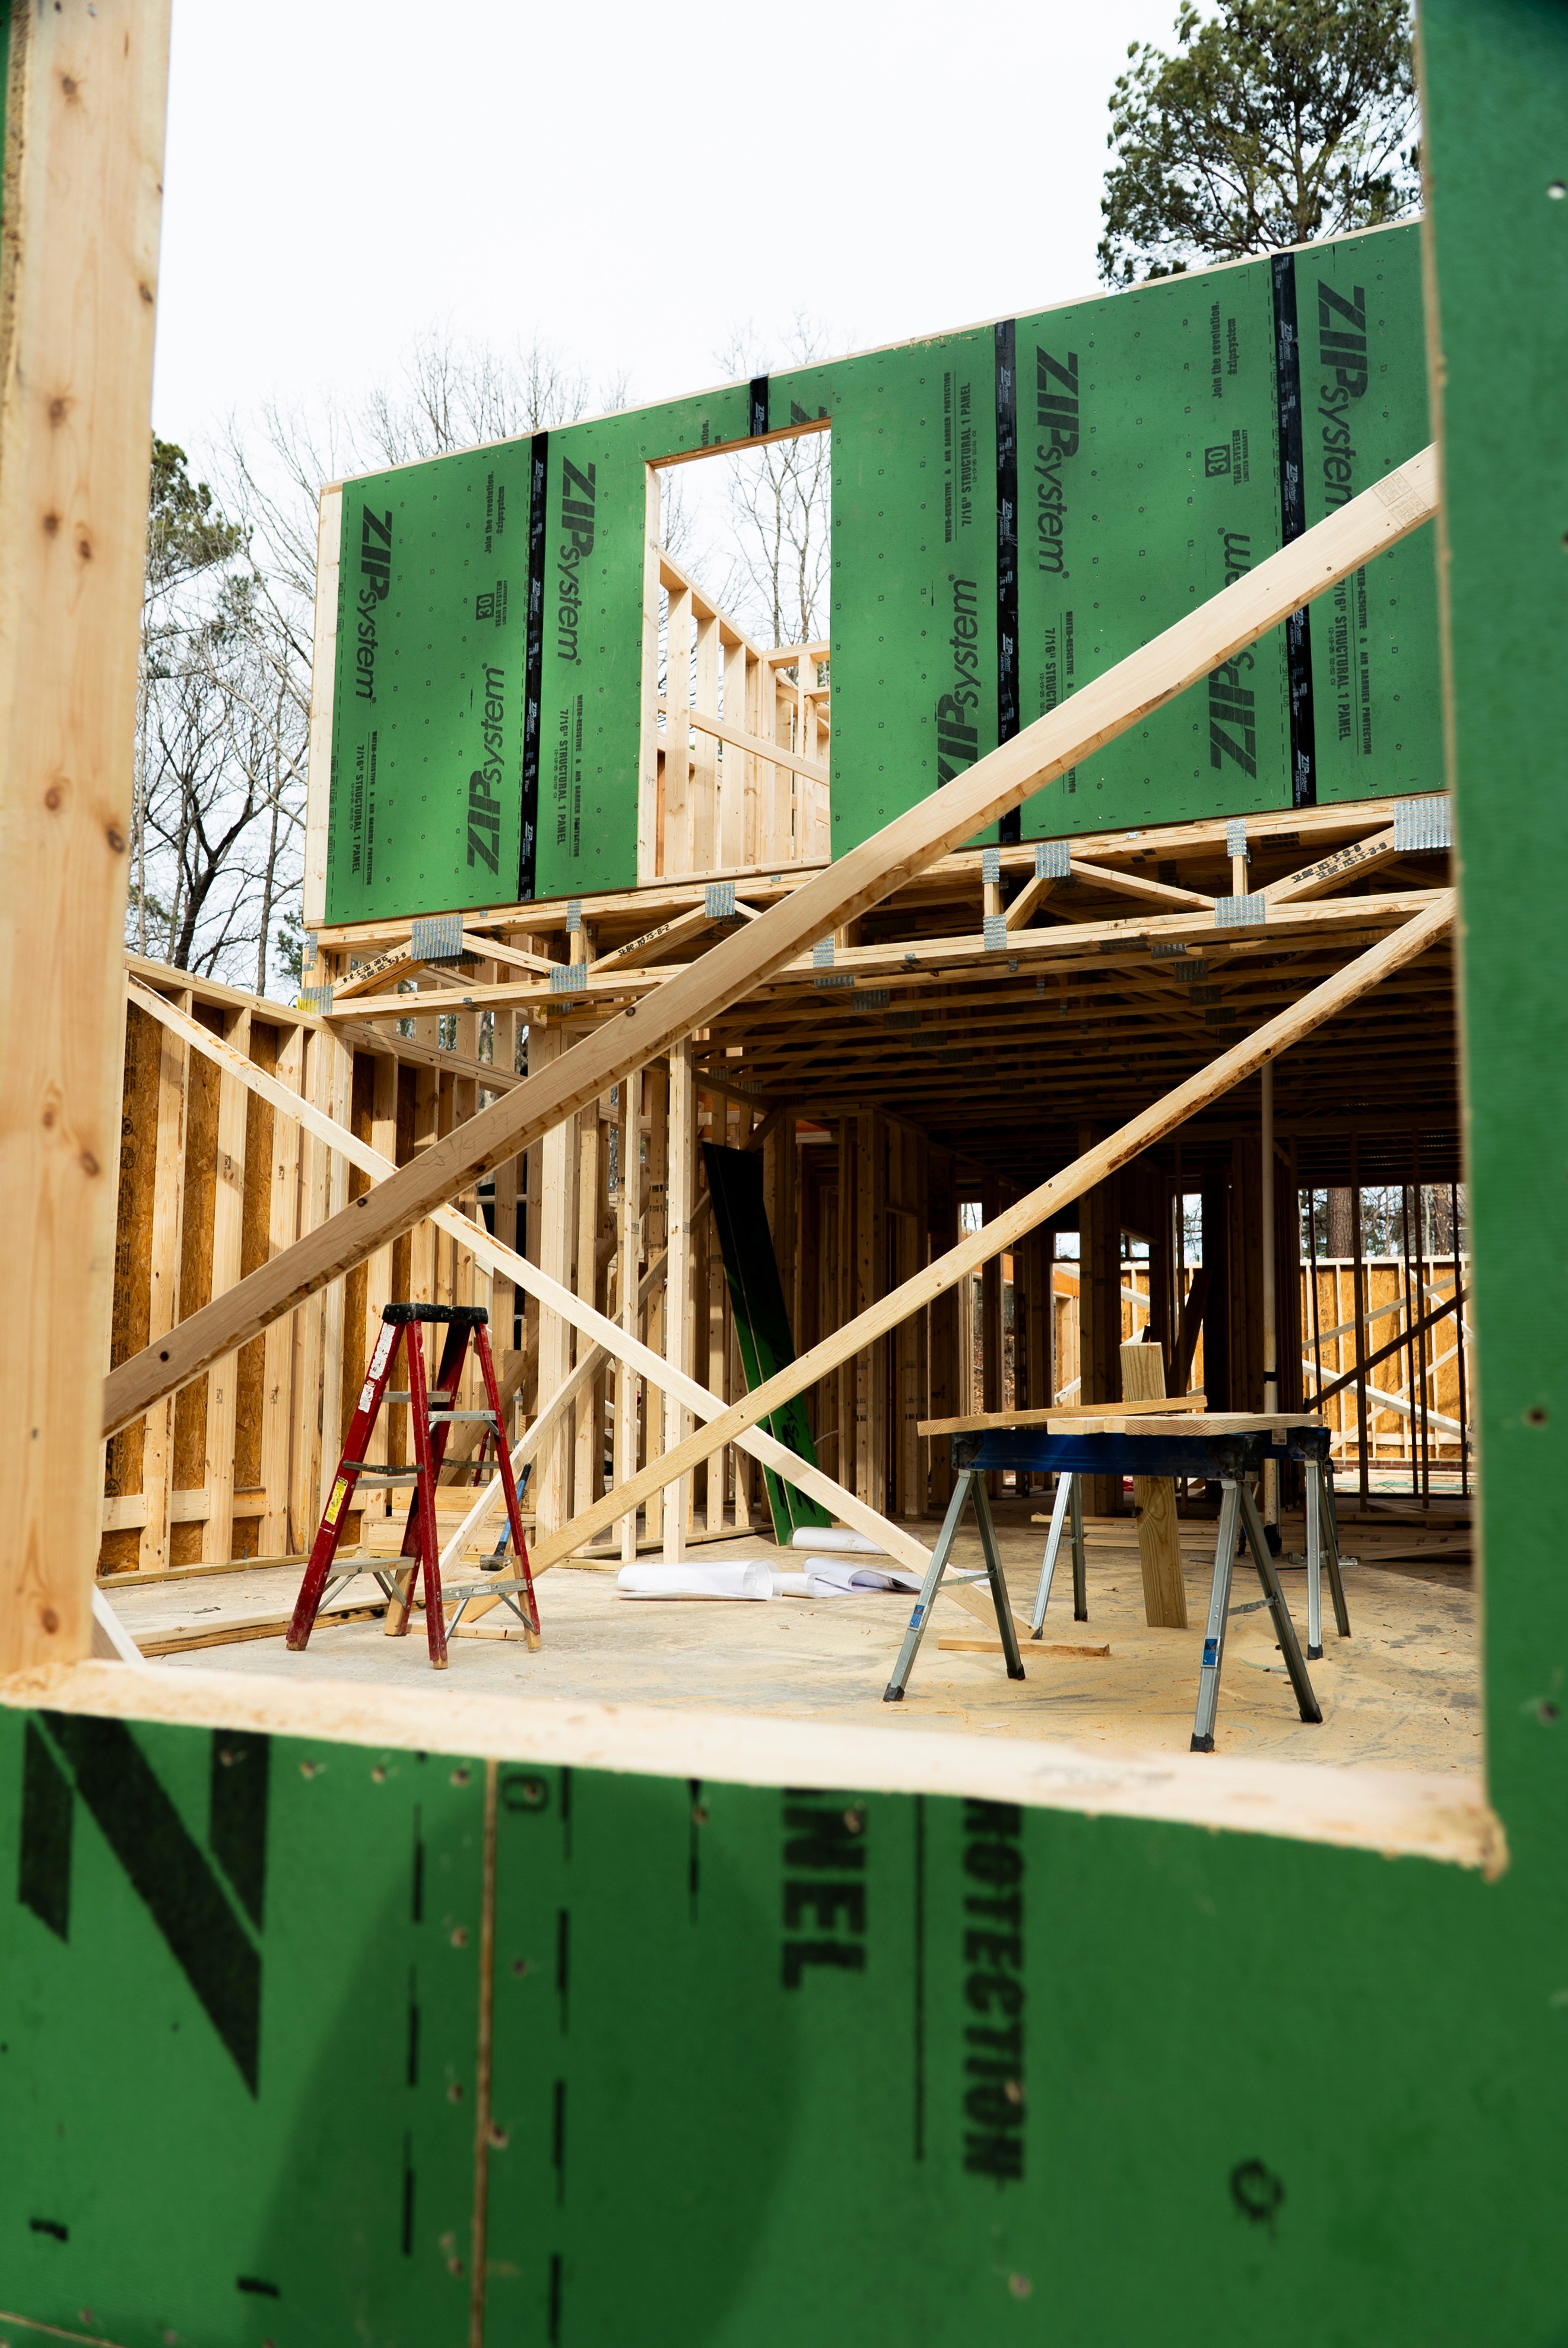
Once drywall goes up in your custom home, adding upgrades becomes 3-5x more expensive. Learn which upgrades to lock in before your walls close up — from sound insulation to smart home pre-wiring.
The Drywall Phase: Your Last Chance for Custom Home Upgrades
There's a moment in every custom home build that most homeowners don't fully appreciate until it's passed — the transition from open framing to closed walls. Once drywall goes up, the internal structure of your home is sealed away. And with it, your most affordable window for upgrades closes too.
Here's why the pre-drywall phase is so critical, and which upgrades you should seriously consider before the sheets go up.
Why Pre-Drywall Is the Decision Point
During the framing and rough-in phases, your home's walls are open. Every stud bay, every joist cavity, every ceiling space is accessible. Electricians, plumbers, and HVAC technicians run their systems through these open cavities with relative ease.
Once drywall is installed, accessing those same cavities requires cutting, patching, repainting, and often retexturing — turning a $200 upgrade into a $1,000+ retrofit. The math is simple: anything you want inside your walls should be decided before drywall delivery day.
Top Pre-Drywall Upgrades to Consider
1. Sound Insulation Between Rooms
Standard fiberglass batt insulation between interior walls provides minimal sound dampening. For bedrooms adjacent to living spaces, home offices, media rooms, or bathrooms, upgrading to sound-rated insulation makes a dramatic difference.
Options include:
• Mineral wool batts (Rockwool) — excellent sound absorption, also fire-resistant
• Resilient channel on one side of the wall — decouples the drywall from the framing, breaking sound transmission paths
• Double drywall on shared walls — adds mass, which blocks low-frequency sound
Cost: $1-3 per square foot of wall area. After drywall: 5-10x more.
2. Smart Home Pre-Wire
Even if you're not ready to install a full smart home system, running the wiring now costs a fraction of what it will later:
• Cat6 ethernet to every room (don't rely solely on Wi-Fi)
• In-ceiling speaker wire for whole-home audio
• Security camera cable runs to exterior corners
• Alarm sensor wiring at doors and windows
• Conduit for future fiber optic or additional runs
The wire itself is inexpensive. The labor to run it through open framing is minimal. Retrofitting through finished walls? That's where costs multiply.
3. Spray Foam Insulation Upgrade
Standard builds use fiberglass batt insulation. Spray foam — either open-cell or closed-cell — provides superior thermal performance, air sealing, and moisture management.
Consider spray foam in:
• Exterior walls (entire home or specific areas like the master suite)
• Cathedral ceilings where ventilation is difficult
• Rim joists and band boards where air infiltration is highest
• Bonus rooms over garages that are notoriously hard to heat and cool
4. Additional Electrical Outlets and Circuits
Think about how you'll actually live in the home:
• USB-C charging outlets in bedrooms and the kitchen
• Dedicated 20-amp circuits in the garage for power tools or an EV charger
• Floor outlets in large living rooms or open-plan spaces
• Exterior outlets on every face of the house for holiday lighting and landscape power
• Under-cabinet lighting circuits in the kitchen
5. Accent Wall Backing and Built-In Framing
Planning a shiplap accent wall? A built-in bookshelf? A wall-mounted fireplace? The time to add backing, blocking, and structural framing for these features is now. Heavy items like:
• Wall-mounted TVs (especially 75"+)
• Floating shelves
• Heavy mirrors or art installations
• Grab bars in bathrooms (aging-in-place consideration)
All need solid blocking behind the drywall. Adding it now costs almost nothing. Retrofitting means finding studs, cutting drywall, adding wood, patching, and repainting.
6. Shower Niches and Custom Tile Preparation
Custom shower niches, benches, and tile-ready surfaces need to be framed before drywall. This includes:
• Recessed niches for shampoo and soap
• Bench framing in walk-in showers
• Waterproofing membrane application (like Schluter or RedGard)
• Proper slope for shower floors
The Pre-Drywall Walkthrough
A good general contractor will schedule a pre-drywall walkthrough with you before the sheets arrive. During this walkthrough:
• Walk every room and verify outlet placement matches your lifestyle
• Confirm light switch locations (especially three-way switches)
• Check that blocking is installed for planned fixtures
• Photograph everything — once drywall goes up, these photos become invaluable for future projects
• Make your final upgrade decisions
SEGC's Pre-Drywall Process
At South Eastern General Contractors, the pre-drywall phase is a structured milestone in every custom home build. We schedule formal walkthroughs, present upgrade options with transparent pricing, and give our clients the time to make informed decisions before walls close up.
With 21+ years of custom home construction in Fayetteville and the surrounding communities, we know which upgrades deliver real value and which ones aren't worth the investment. We'll tell you the truth either way.
Planning Your Custom Home?
The decisions you make during the pre-drywall phase will affect your home's comfort, functionality, and value for years to come. Start the conversation early with a builder who helps you think ahead.
Contact South Eastern General Contractors at (910) 565-4719 or visit southeasterngc.com to discuss your custom home build.

South Eastern General Contractors
South Eastern General Contractors is a Native American-owned, 8(a) and HUBZone certified construction firm with over 21 years of proven results across Fayetteville, Lumberton, and the surrounding North Carolina communities. We build legacies, not just structures.
Ready to Build With Clarity and Confidence?
Your project deserves more than a contractor who just shows up and starts building. We guide you through a professional design-build process built around clear plans, detailed selections, documented scopes, and construction checklists that help eliminate confusion, mistakes, and missed expectations.
Other Blogs